t
a
r
t
Diary
Download
Insight
Questions?
Food
Links
m
p
r
i
n
t
|
S t a r t |
Diary |
Download |
Insight |
Questions? |
Food |
Links |
I m p r i n t |
|
|
|||||||
|
At this column you can learn to create your own egg-O-shOOter. |
| <<< Bunnies, eggs and other objects >>> |
|---|
|
Until now you just were confronted with objects defined by one single 'Texture' - that's the notation of pictures bound to the surface of OpenGL objects. Now you will learn to use two graphics to define one single object. Two graphics for one object, why do things so complicated? Because of the fact, that the objects need to be bordered. The simplest object is a triangle. The next step is a tetragon, followed by a pentagon, hexagon and so on. While playing egg-O-shOOter you have seen many objects with nearly any shape. Theoretically you could define those shapes by defining objects with maaaany edges, but that would mean to use huge computing power and a lot of programming work. But how are those objects defined? Simply by using two different graphics for one texture. One image is used to define the shape of the object and the other defines the surface. As an example I like to explain the creation of a new bunny (dog). Those bunnies (the first egg throwing animals of the egg-O-shOOter universe were bunnies) consist of quads. So we have to create a new image file with the same values for width and height. Let's use 256 pixels for both and use Gimp to paint a bunny. 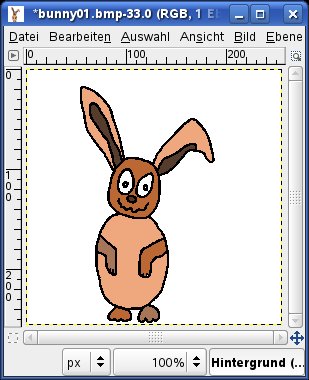 As soon as you have finished your creation, you can built the two needed image files. First thing to do is filling the background, which should be cut off, with black color. Therefor we need really black color. Click at the main window of Gimp at the field with the foreground color (red arrow). At the appearing window you have to set the three values (red, green, and blue) of the used color to 0. Confirm the selection with 'OK'. 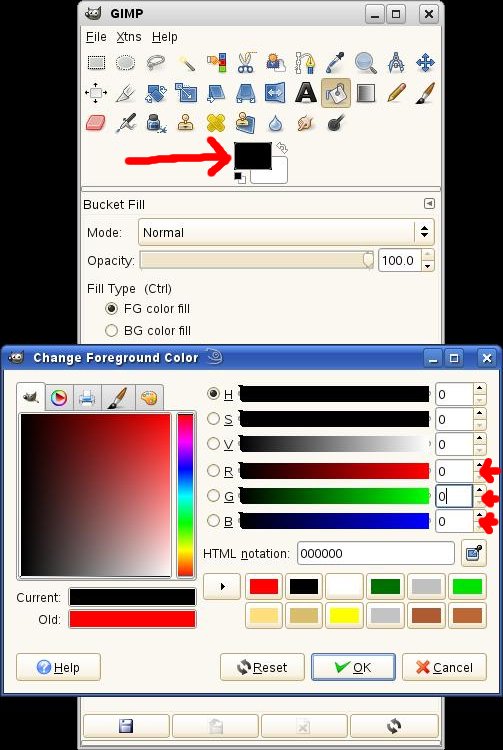 Fill the background areas with this black color. Use these values for the filling tool: 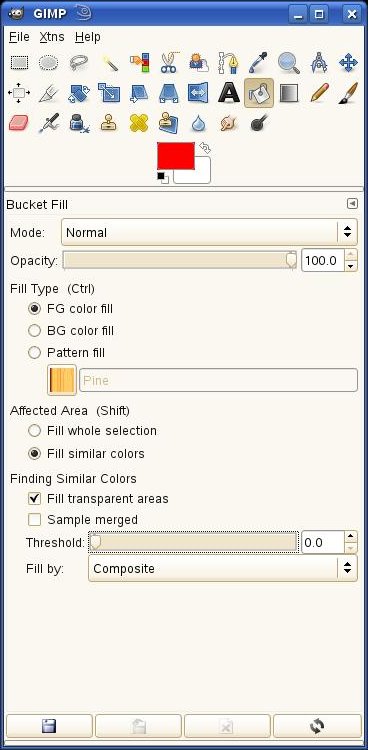 Mode 'Normal', Opacity 100%, Fill type 'FG color fill', Affected area 'Fill similar colors' and Threshold should be set to 0.0. Click at a point in the background of the image and the area will be filled with black color. 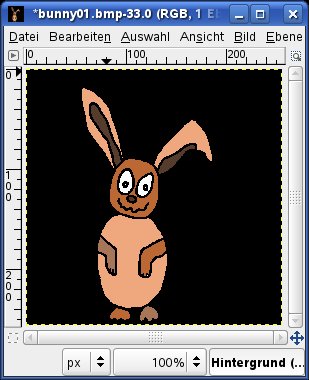 Image file number one can now be saved as 'bunny01.bmp' in the subdirectory 'MyKitchen'. Let's create graphic number two. Click at 'Edit -> Undo Filling', whereon the background appears white again. Now the area which should NOT be cut has to be filled with black color. Take the 'Fuzzy select tool' by clicking at the button marked with a red arrow at the picture down below. 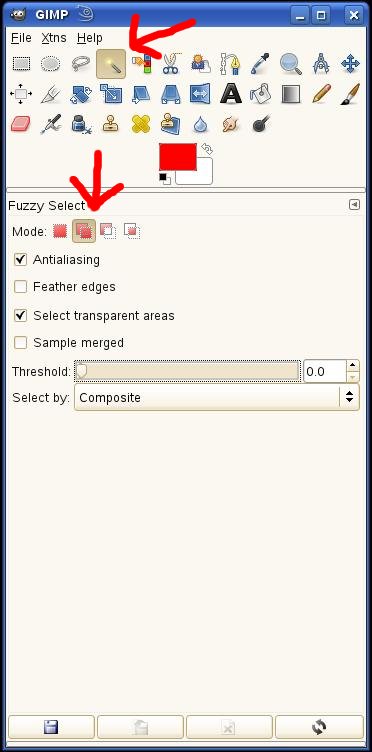 Setz the threshold to 0.0 and click at a point at the background, which should be cut away. The selected area is marked by a doted line. Click at 'Select -> Invert' whereby the bunny becomes the marked area. This area has now to be filled with black color. Take the Bucket Fill tool and mark the field 'Fill whole selection'. Click at a point of the bunny and the whole bunny will become black. 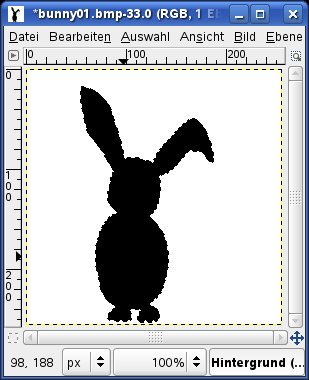 That is our second graphic which has to be saved as 'bunny01_m.bmp'. That's our new bunny. Why do we need the two graphics? The picture format 'gif' can define transparent areas with one single graphic. OpenGL uses 'blending' to cross fade the two graphics pixel by pixel. With the bunnies a version is used which adds the black pixel of 'bunny01.bmp' and the white pixel of 'bunny01_m.bmp' to a transparent pixel. The pixel above the black pixel of 'bunny01_m.bmp' (the mask) remain unmodified. If the black area of the mask is not completely black (red=0, green=0, blue=0), the whole object becomes sightly transparent. An example for transparent objects are the jellyfishes at the 'under water' theme. The normally black area of the mask is almost white (red=254, green=254, blue=254). To clarify the mask area of 'jumpingbunny09_m.bmp' I used the 'Fuzzy select tool' at the picture down below. The object becomes more transparent the darker the area of the graphic jumpingbunny09.bmp is.  As you can see, you can do more than just cutting an area of a graphic with the help of blending - try it. At last a remark on the hit control of egg-O-shOOter. Normally all pixel of the mask file being completely white (red=255, green=255, blue=255) can NOT be hit. You can define more colors of the mask file as hitable or not. The variables at the file 'themes.txt' are named HitColorR, HitColorG, HitColorB. |
| <<<Back to frame Continue with fonts>>> |